Easy Layer Containers With Florissa
If you’ve never done layer planting before, don’t worry, it’s super-easy! Here’s our easy step-by-step guide!
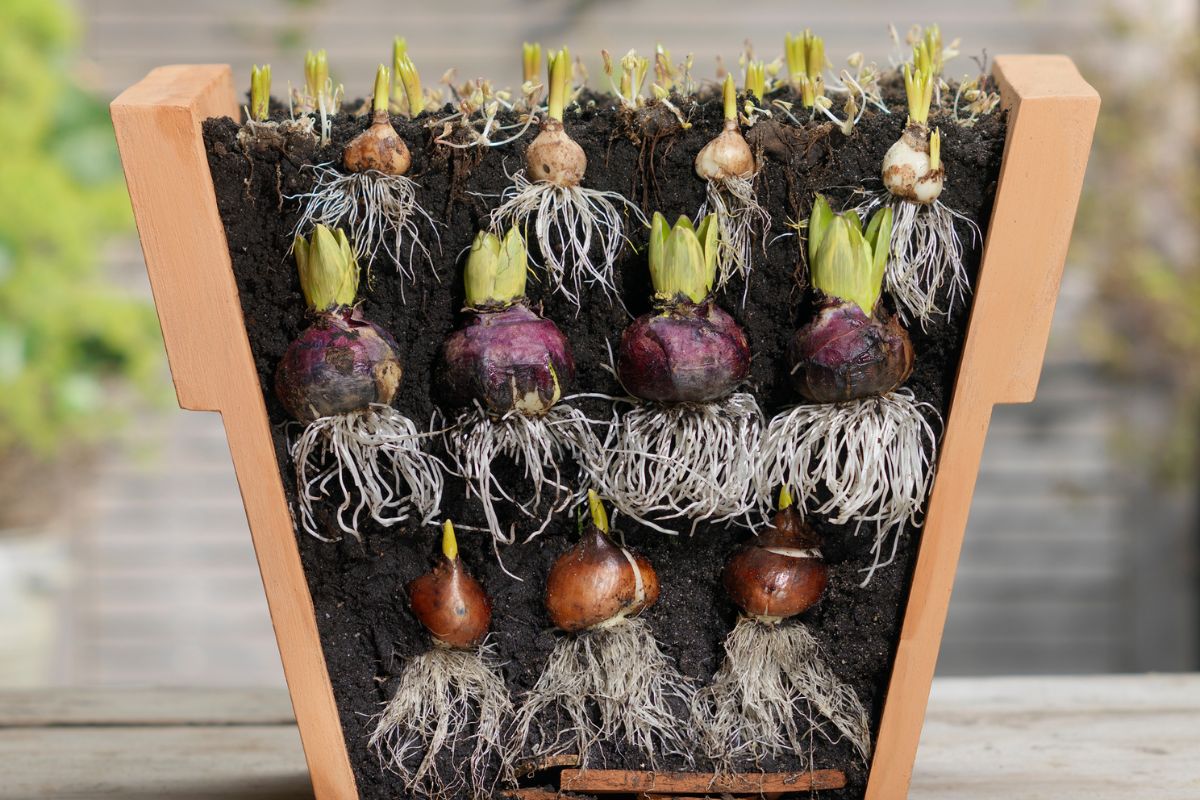
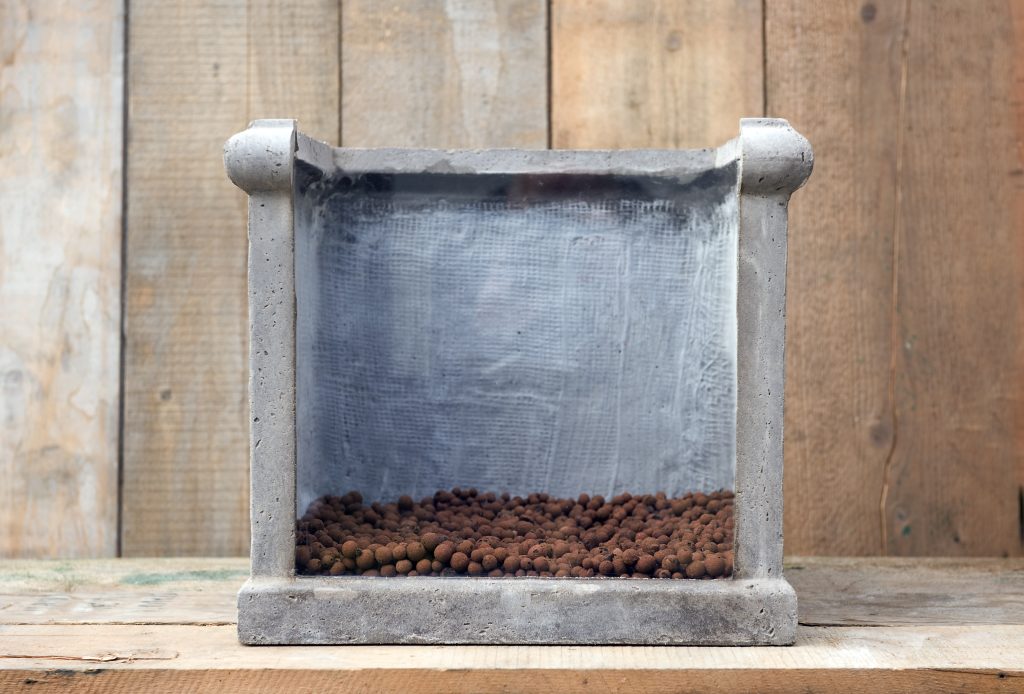
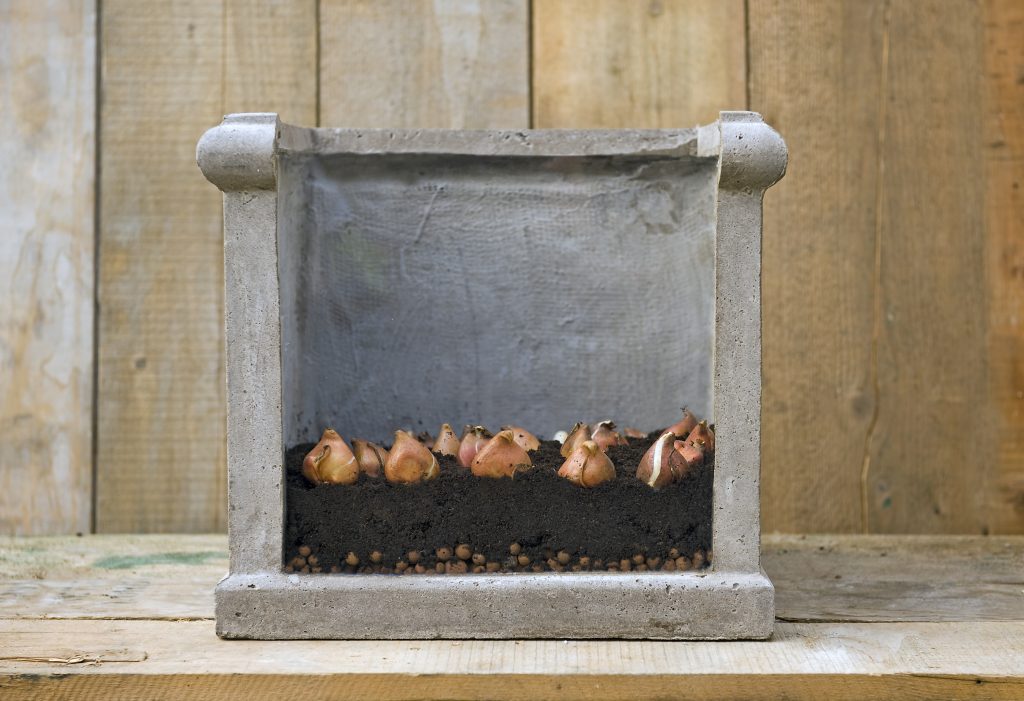
First, select your container. Plastic pots won’t crack unlike terra cotta, and they offer some protection against cold wind. Pick one at least 12-14” inches deep with drainage holes. The pot’s diameter can be 8-10” inches across. Bulbs grow best in well-draining soils, so we’ll start by placing a layer of small rocks, pebbles or gravel in the bottom inch of the pot. Top off the small rock layer with 2-3” inches of a moist soil mixture. Bulbs that require the greatest depth in the soil are planted first, such as tulips or narcissus. In this recipe, we’re starting with Washington tulips that should be planted 6-8” deep. Arrange them in the center of the pot, spacing them about a half inch apart from each other.
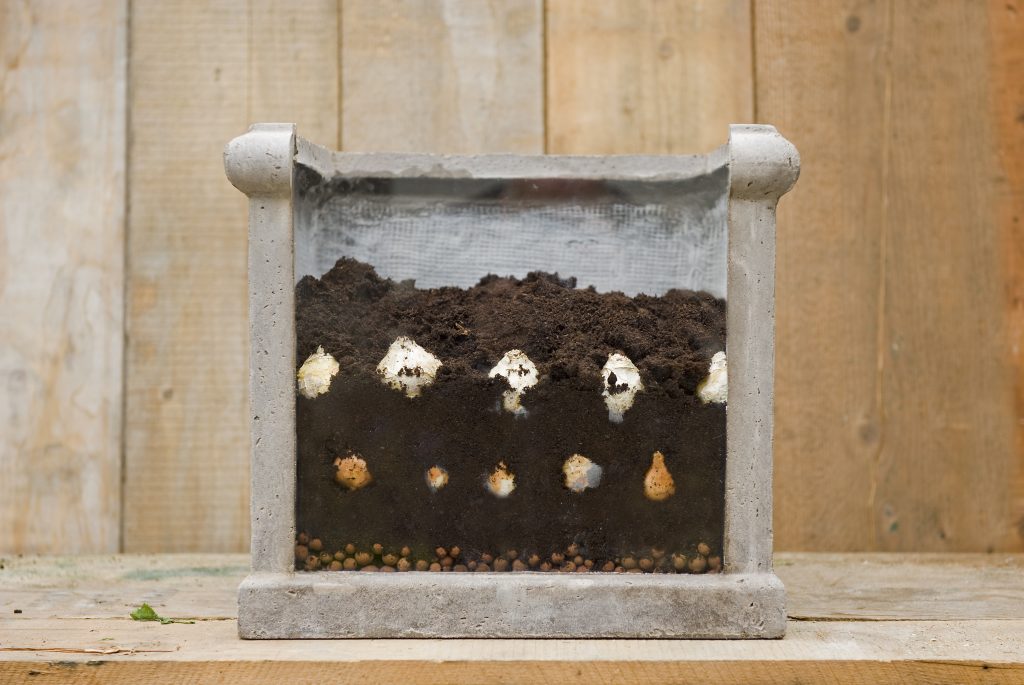
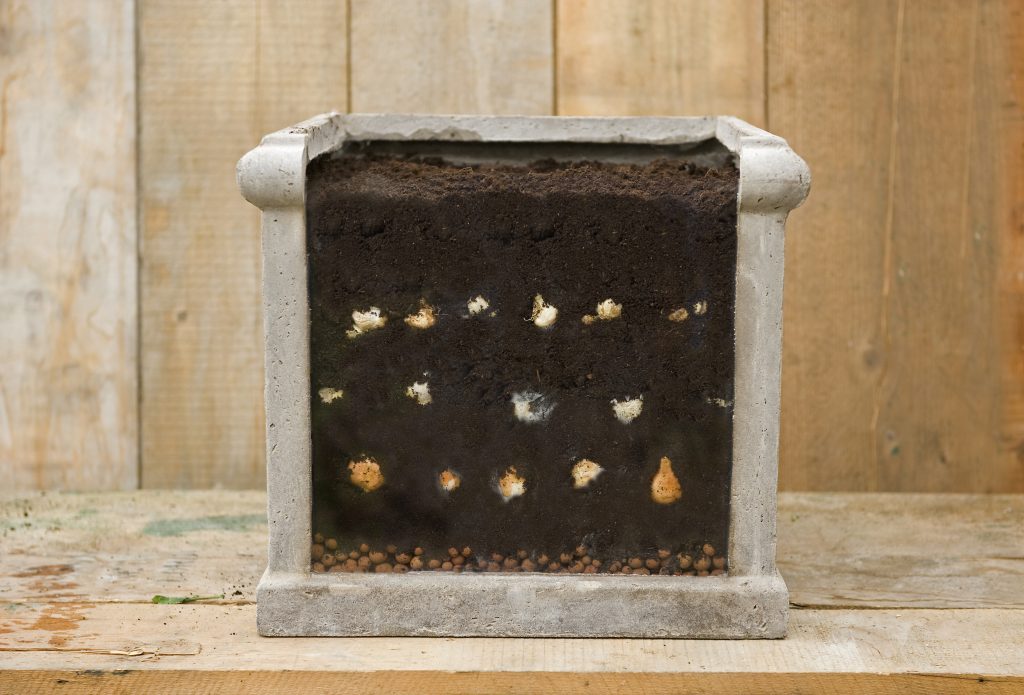
Cover them with another 2-3” inch layer of your soil mixture. You can sprinkle a little bone meal on top if you like. Next plant bulbs that should be set about 4-6” inches deep. Following our recipe, narcissus Tête a Tête is second up. Set these bulbs in groups of two or three – in and around the edges of where you planted the tulip bulbs below. Top with another 2-3” inches of soil and bone meal.
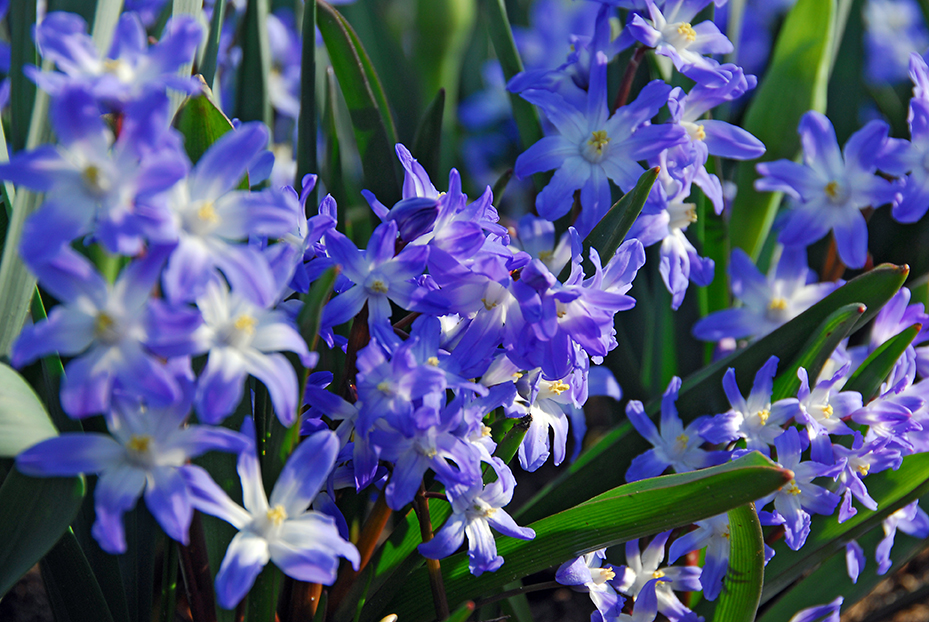
For the third layer, we’ll plant the Glory of The Snow. These small round bulbs need to planted 3” inches deep. Pairing two bulbs together, but not quite touching, will make nice clusters of blooms around the edges. The Blue Poppies can also be planted on this same layer as these corms need to be 2” inches deep. Put them around the edges, or dot the surface, for stunning blue sapphire blooms. Finally cover with a final 2-3” inch layer of soil and bone meal, and water in well. That’s all there is to it! You’re done! Feel free to use any of your favourite spring flowering varieties as well.
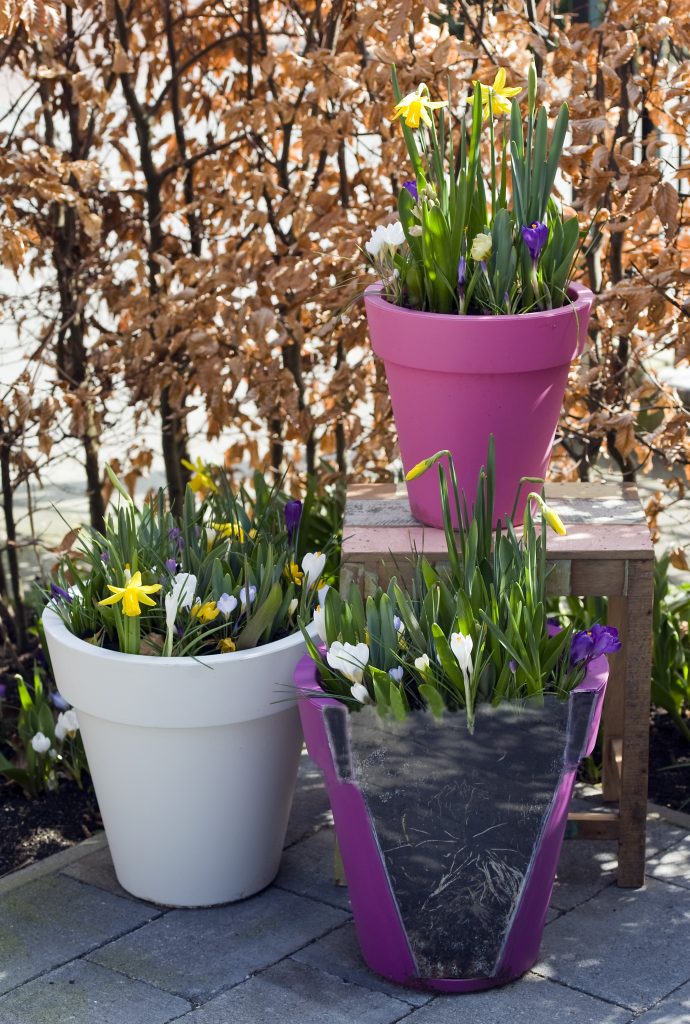
Place your container in a protected spot alongside the house, under a hedge, or in an unheated garage where it is out of the sun and wind. If your container is in the garage, check on it periodically over the winter and water it, as you don’t want the soil to completely dry out. In the spring, when the tips of the bulbs start to poke through the soil, move your container to a warmer location that receives part sun. Watching and waiting for the blooms to appear is the most exciting part!