
Easy Layer Containers with Florissa
The leaves are changing colour, the air is crisp, and fall bulb planting season is upon us! While fall planting & gardening is a treat, the real reason for fall bulb planting is so that we can enjoy those stunning blooms next spring! You can pick all your favourites, and make your containers completely customized to your own style! Have you been thinking about planting bulbs this fall, and desire blooms & lasting colour all spring long? The solution? Layered bulb containers! We want to share with you the super easy, and creative way to plant those fall bulbs, with this step-by-step guide on layered container gardening!
Planting Your Container
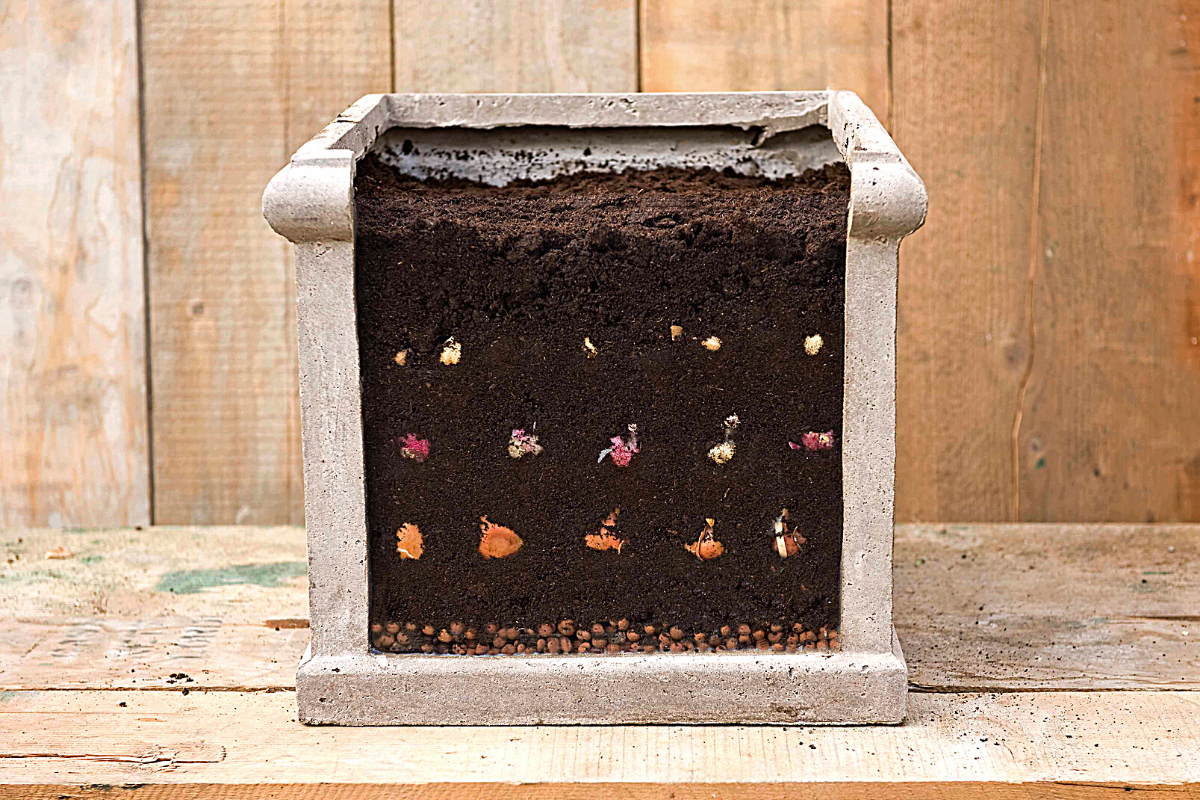
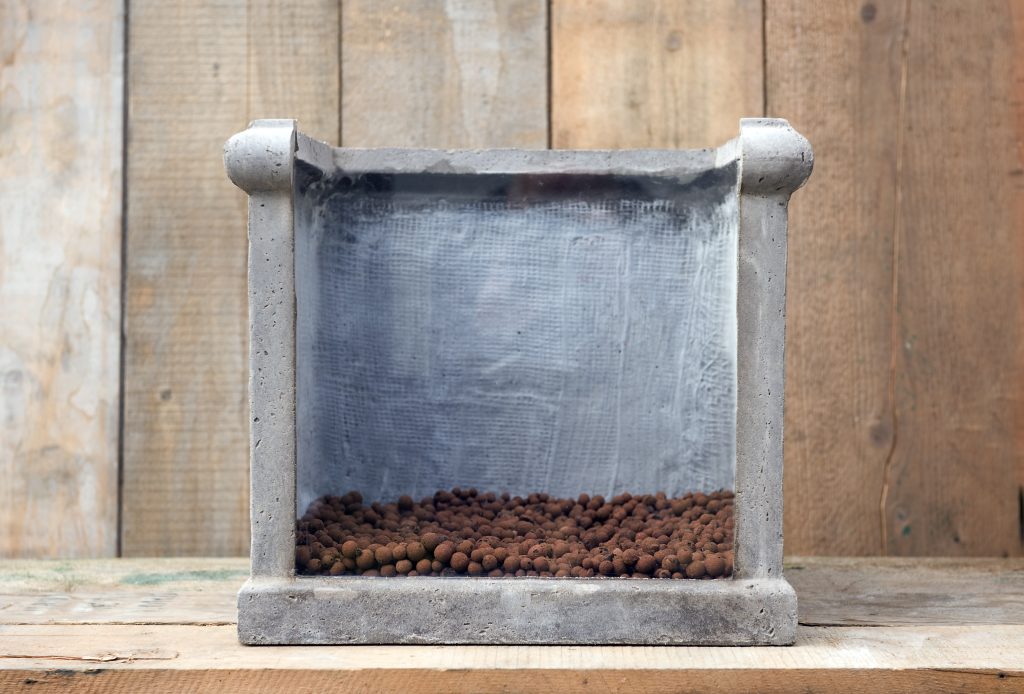
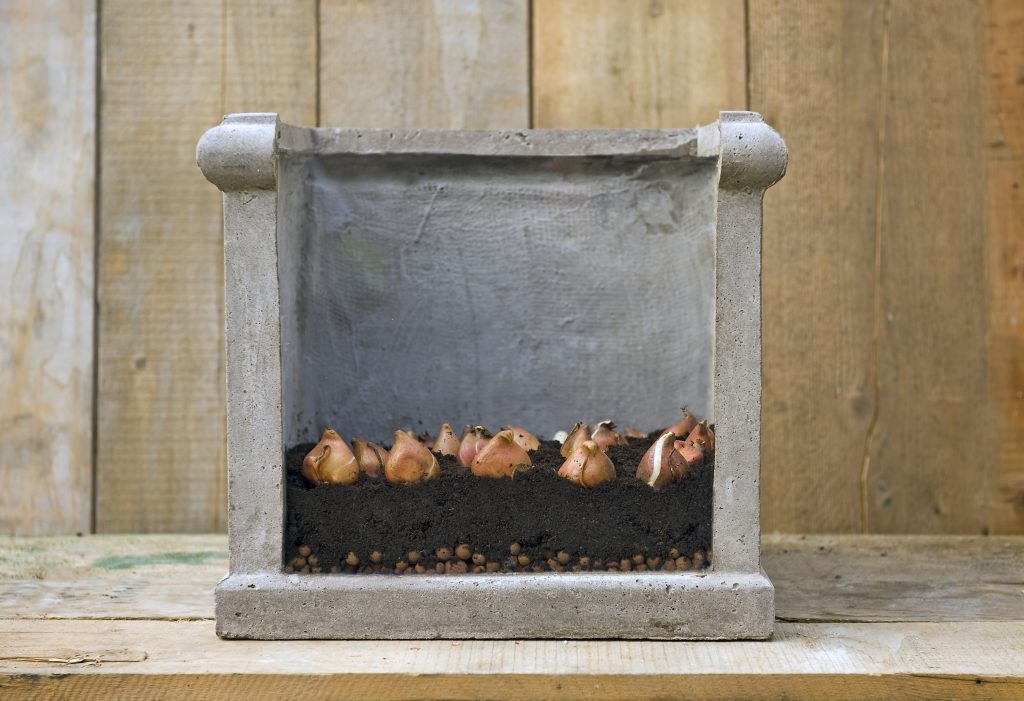
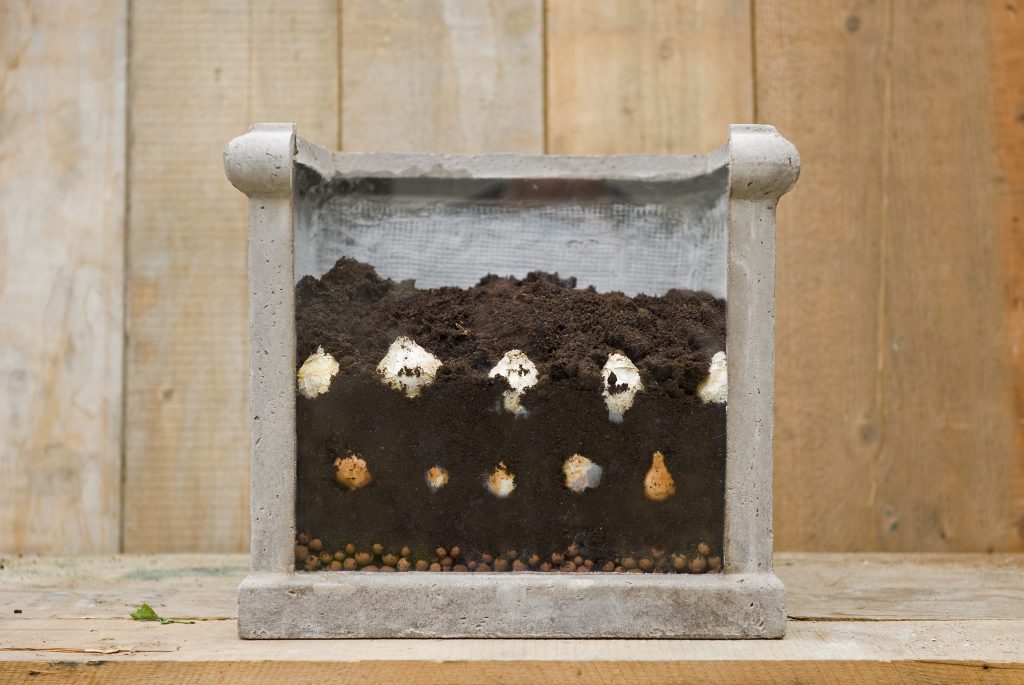
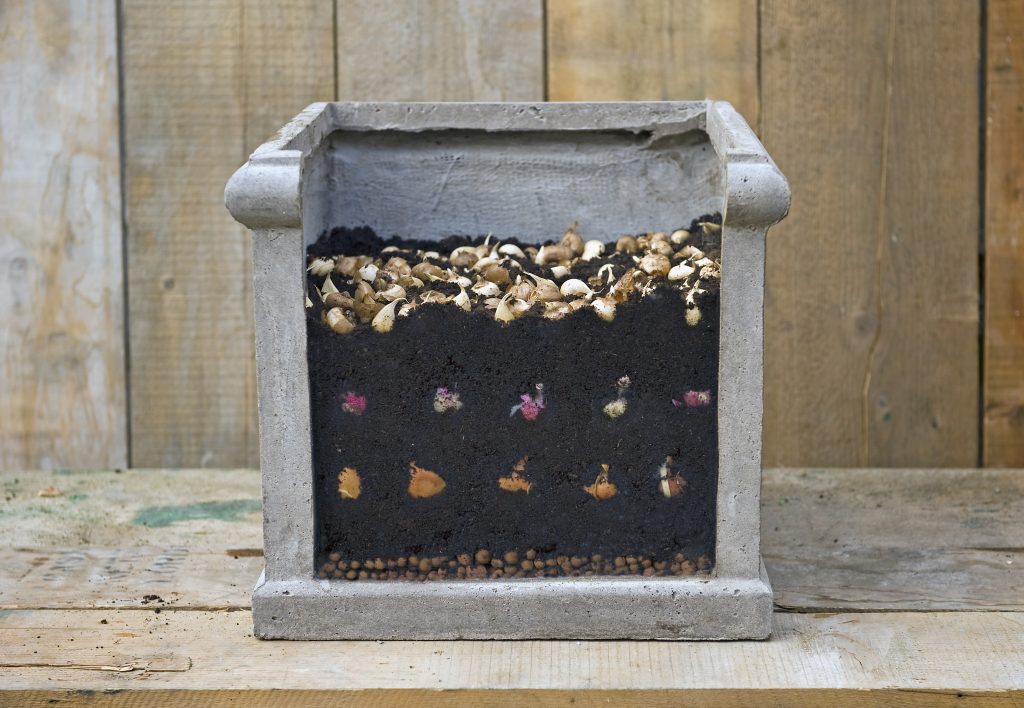
First, select your container, one that you like of course! Plastic pots won’t crack unlike terra cotta, and plastic offers some protection against cold wind. Nothing is worse than finding a cracked container after you spent your time planning and planting your beautiful spring show! Pick a container at least 30-35 cm (12-14”) deep with drainage holes. The pot’s diameter can be about 20-25 cm (8-10”) across, depending on the number of bulbs you are going to plant. Bulbs grow best in well-draining soils, so we’ll start by placing a thin 2.5 cm (1”) layer of small rocks, pebbles, or gravel in the bottom of the container, this ensures proper drainage. Top off the small rock layer with 5-8 cm (2-3”) of a moistened soil mixture. Bulbs that require the greatest depth in the soil are planted first, such as tulips or narcissus. In this recipe, we’re starting with tulip ‘Don Quichotte’, a gorgeous pink tulip, that will stand tall and strong, and be sure to put on a show! These bulbs should be planted about 15-20 cm (6-8”) deep. We chose, the mid-spring triumph Tulip ‘Don Quichotte’ but you can choose your favourite tall tulip or daffodil! Arrange them in the center of the pot, spacing them about a half inch apart from each other.
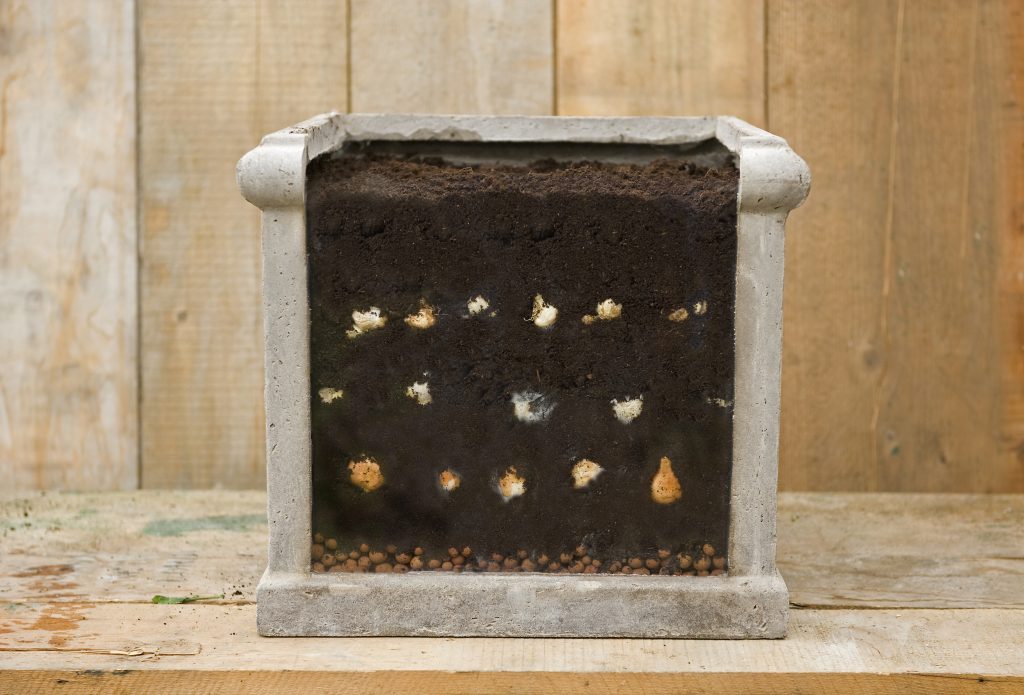
Second, cover the bulbs with another 5-8 cm (2-3”) layer of your soil mixture. You can sprinkle a little bone meal on top if you like, this will help with the rooting of the bulbs. Next plant bulbs that should be set about 10-15 cm (4-6”). Following our recipe, Hyacinth ‘Delft Blue’ is second up. This sweetly perfumed variety is such a delight with enticing blue towers of blooms! It screams spring! They will stand at about 25-30 cm (10-12″) tall in full bloom. Set these bulbs in and around the edges of where you planted the tulip bulbs below. A good tip is to avoid planting bulbs in the 2.5-5 cm (1-2”) ring just inside of the pot. This area of soil will be extra insulation for the bulbs and help give them a buffer from extreme winter temperatures and allow better drainage around the bulbs. Top with another 5-8 cm (2-3”) of soil and sprinkle with bone meal, just like the first layer.
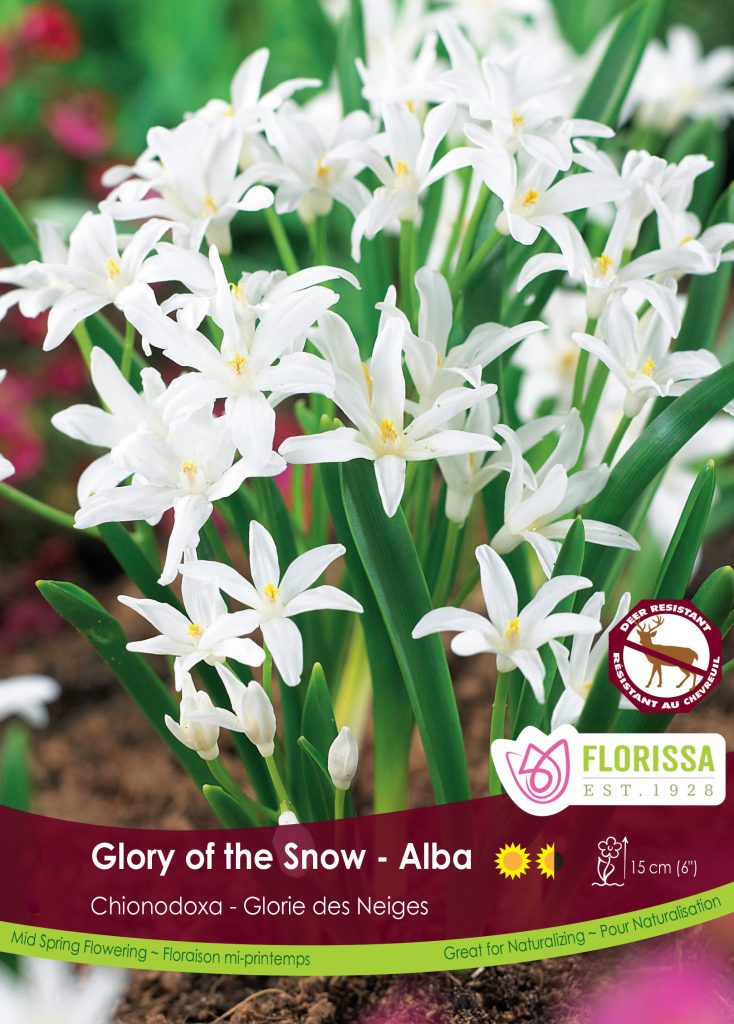
For the third and final layer, we’ll plant the Glory of The Snow – Chionodoxa forebesii, a long-lasting bloomer, with a petit height of 15 cm (6″). This is the layer that will bloom first, in the early spring. That is why it was given the name Glory of the Snow as it often peeks through the blanket of late-season snow. These small round bulbs need to be planted only 8 cm (3”) deep. We recommend pairing 2-3 bulbs together, but not quite touching, as this will make nice clusters of blooms around the edges. Finally cover with a final 5-8 cm (2-3”) layer of soil and bone meal, and water in well. That’s all there is to it! You’re done!
Next, find a spot to place your container in a protected spot alongside the house, under a hedge, or in an unheated garage. It is o.k. for the planted containers to be out in the rain and elements as the bulbs still need to have 10-17 weeks of cold temperatures, ensuring that they bloom at their proper heights. If you are in an area where long periods of -20 °C and lower temp. is a winter norm, then some protection the dry winds will be needed. Keep in mind snow acts as a helpful insulator. If your container is in the garage, check on it periodically over the winter and water it, as you want the soil to be damp and not completely dry out.
Finally, in the spring, when the green tips of the leaves start to poke through the soil, move your container to a warmer location that receives part sun. Keep the soil moist and before you know it, the show will begin! You’ll have stunning blooms all spring
There are so many different combinations when it comes to layered planting, so get creative, and pick your favourites! Here are a few of our favourite recipes to help spark some ideas!
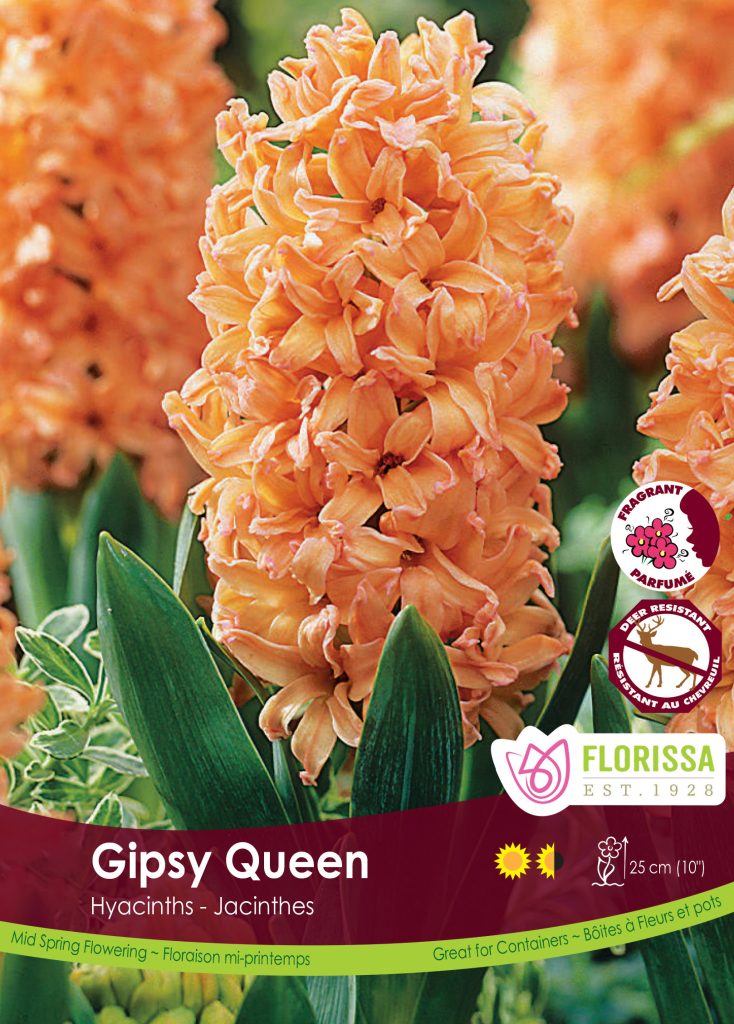
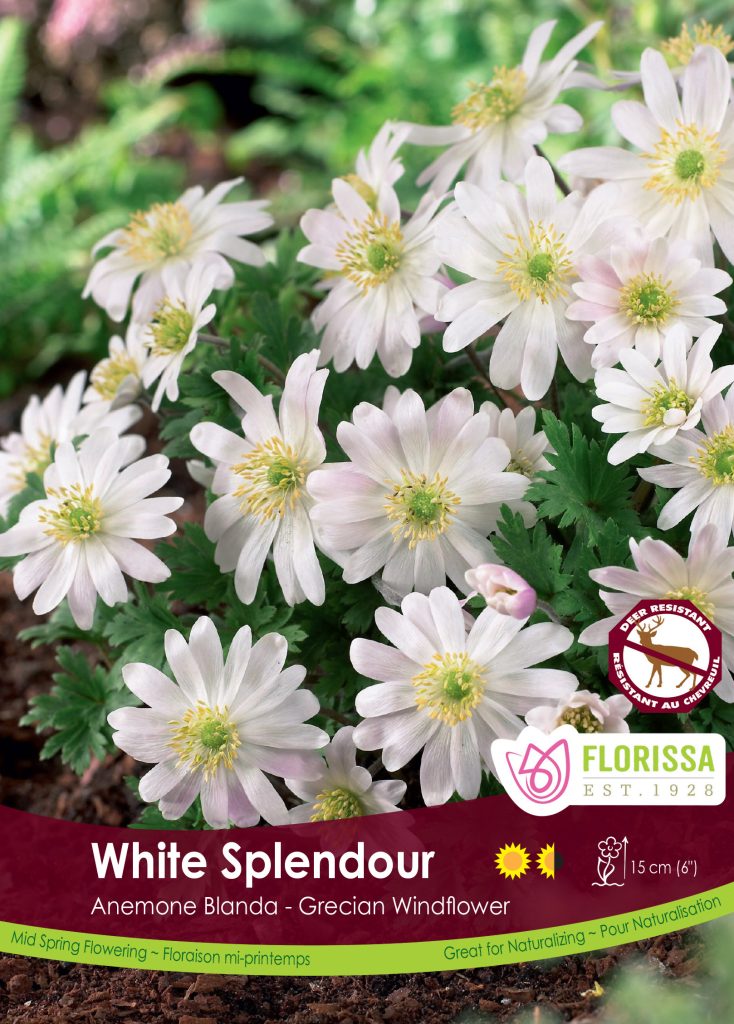
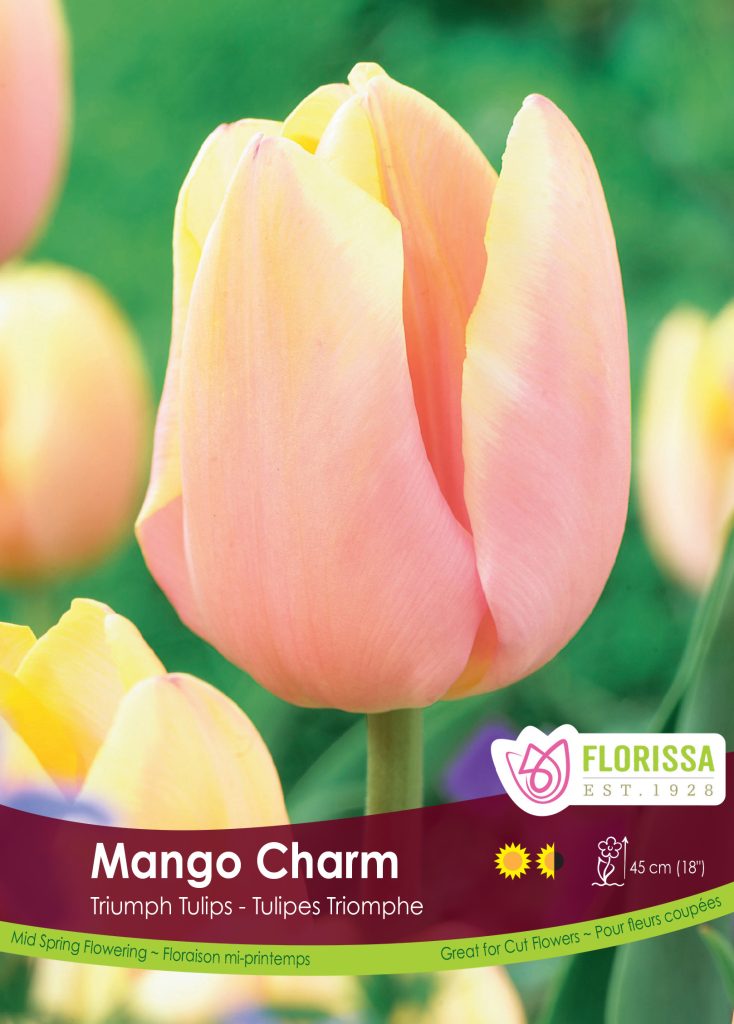
Peach Bellini – Anemone White Splendor, Hyacinth Gipsy Queen, Tulip Mango Charm
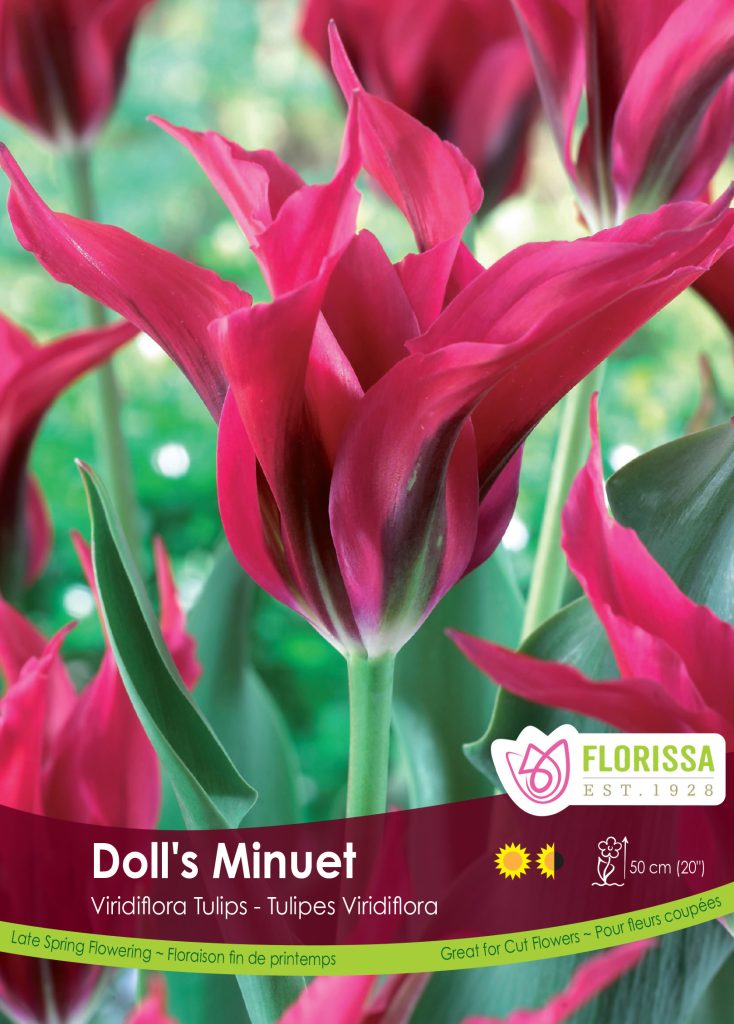
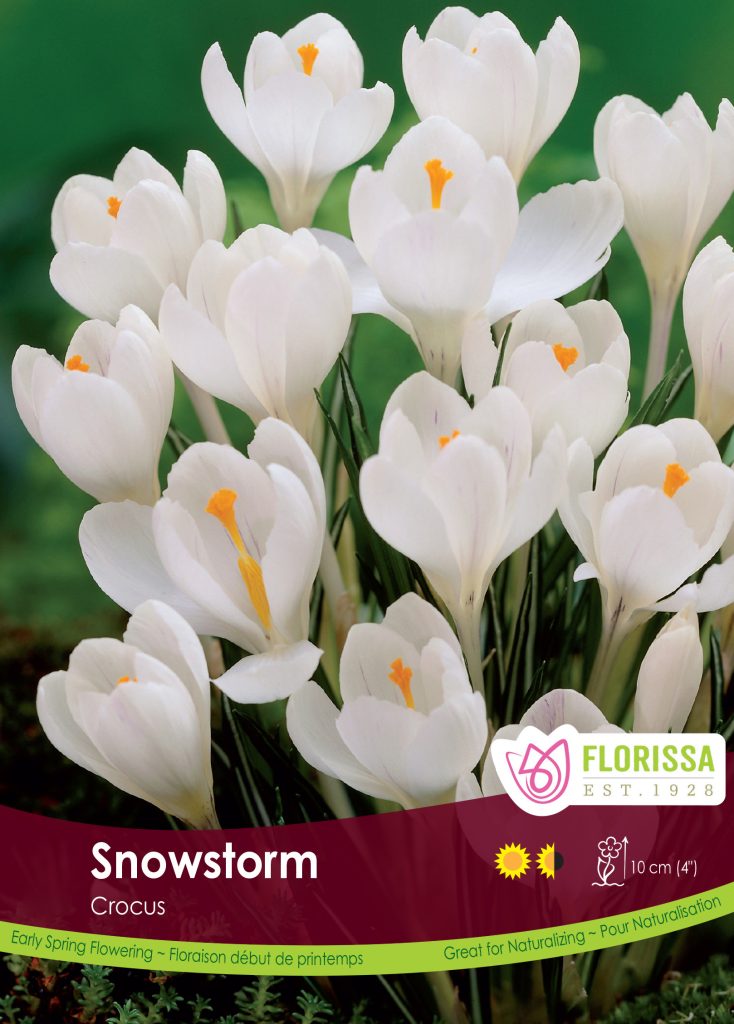
Raspberry Fizz – Crocus Snowstorm, Hyacinth Woodstock, Tulip Doll’s Minuet

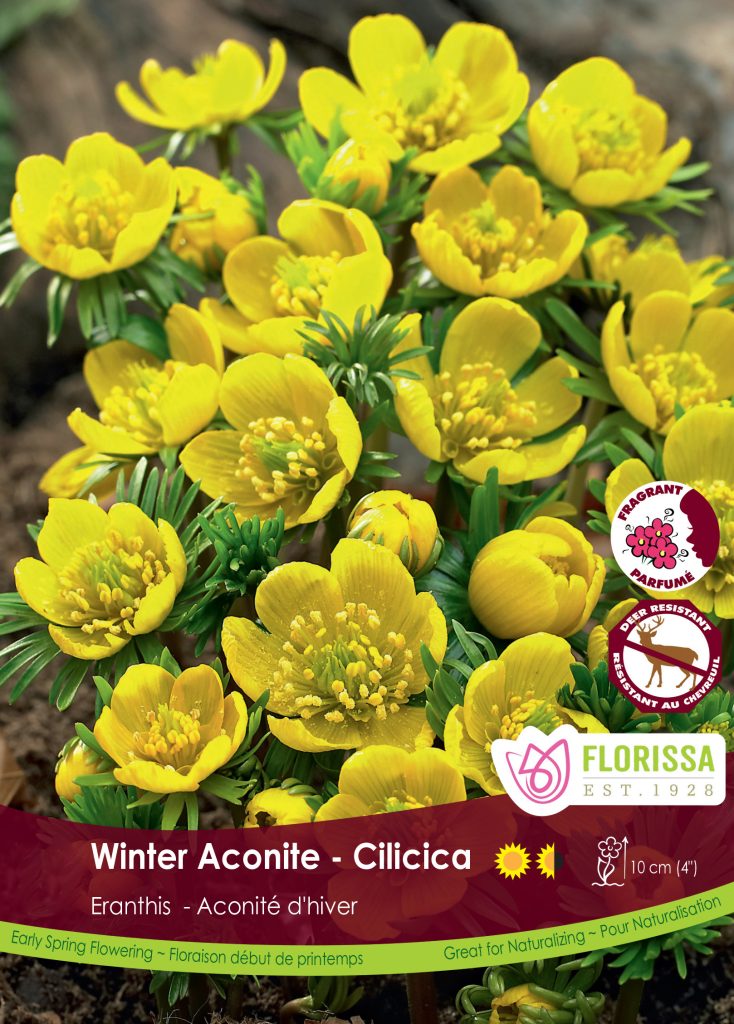
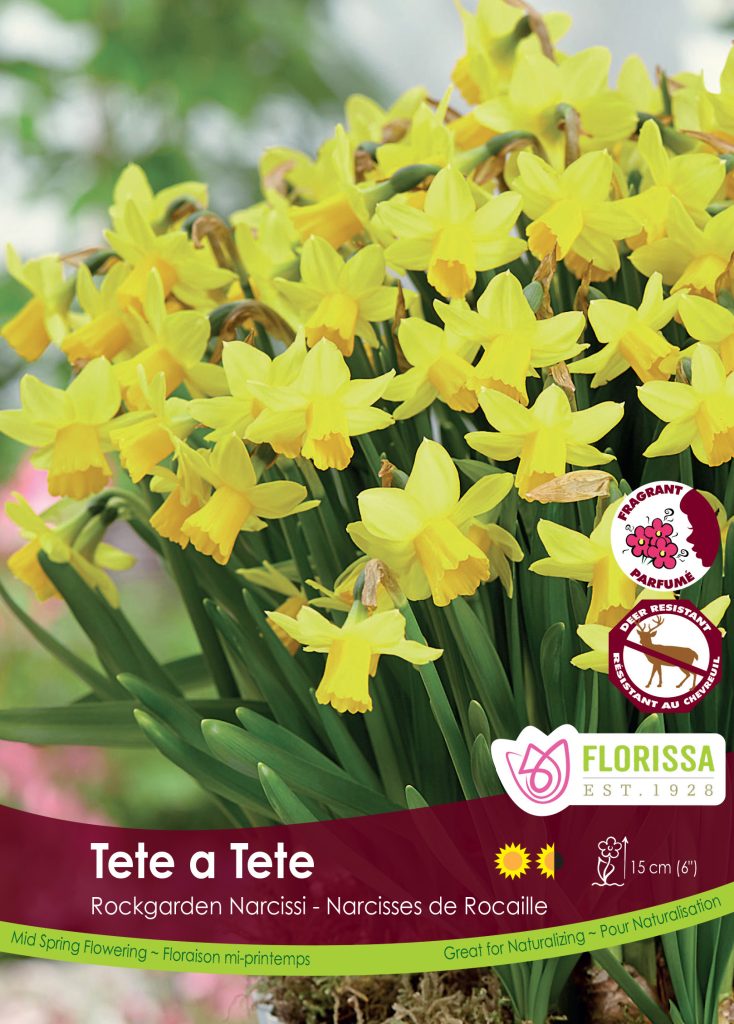
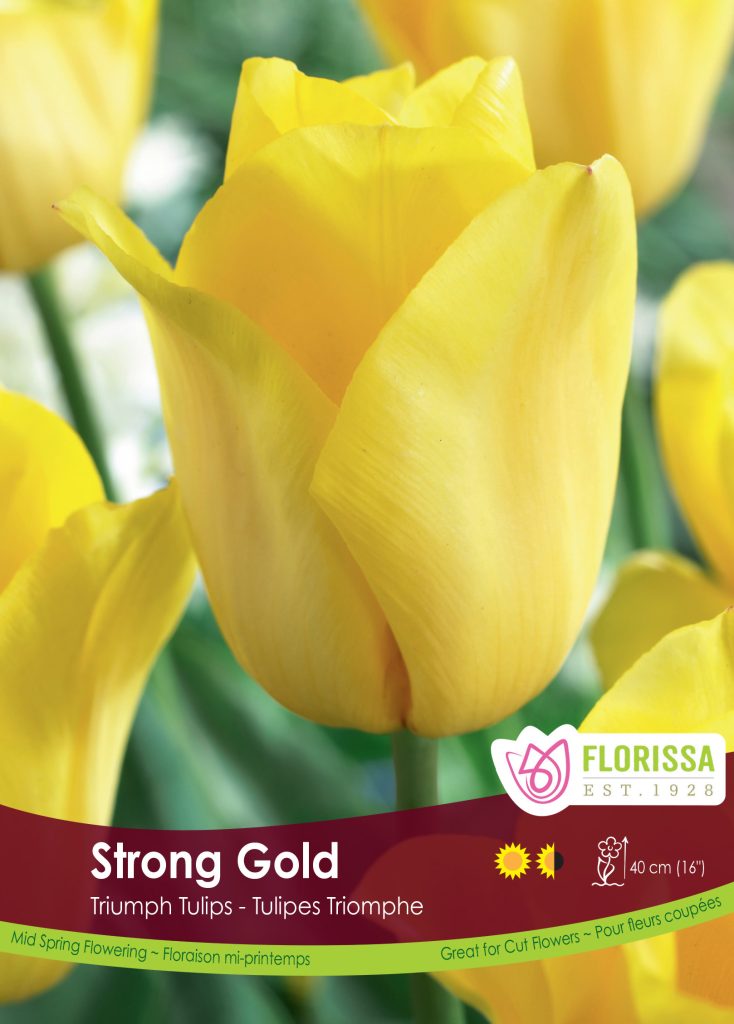
Lemon Spritz – Eranthis Cilicia, Chionodoxa alba, Narcissus Tete a Tete, Tulip Strong Gold
For more information, or to find a garden centre nearest to you, please visit find a retailer.